Second Anglo-Afghan War: The Great Game and the Struggle for Central Asia
The Second Anglo-Afghan War (1878–1881) was a pivotal military conflict fought between the British Raj and the Emirate of Afghanistan. This struggle was a critical chapter of the Great Game, the strategic geopolitical rivalry between the British and Russian Empires for supremacy in Central Asia. The war, which spanned over two years, fundamentally reshaped the political landscape of the region and established Afghanistan as a buffer state.
Key Facts
- Duration: 21 November 1878 – 27 April 1881.
- Primary Belligerents: The British Empire (including forces from India) vs. Afghanistan and various Afghan tribes.
- Key Outcome: Anglo-Afzalid victory; Afghanistan became a de jure British protected state.
- Major Treaty: The Treaty of Gandamak (1879).
- Political Result: Abdur Rahman Khan was installed as Emir.
- Territorial Changes: Quetta, Pishin, Sibi, Harnai, and Thal Chotiali were ceded to British India.
The Road to Conflict: Diplomatic Tensions
The conflict was sparked by escalating tensions between Russia and Britain. Following the Congress of Berlin in June 1878, Russia shifted its focus toward Central Asia, sending an uninvited diplomatic mission to Kabul in July 1878. The Amir of Afghanistan, Sher Ali Khan, attempted to block the Russian envoys, but they arrived regardless.
In response, the British demanded that Sher Ali accept a reciprocal British mission. Lord Lytton, the Viceroy of India, ordered a mission to Kabul in September 1878, but it was turned back at the Khyber Pass. When the Afghan government failed to meet a British deadline of November 20, the British Empire declared war.
The First Campaign and the Treaty of Gandamak
The first phase began in November 1878 with a British invasion involving approximately 50,000 men, primarily Indian soldiers, advancing in three columns. Following victories at the battles of Ali Masjid and Peiwar Kotal, the path to Kabul was left largely undefended.
Sher Ali Khan fled toward Mazar-i-Sharif, hoping to draw the British into a costly occupation and seek Russian aid. However, the Russian Tsar refused him entry, and Sher Ali died in February 1879. His son and successor, Mohammad Yaqub Khan, sued for peace, leading to the Treaty of Gandamak on May 26, 1879.
Under this treaty, Yaqub Khan relinquished control of Afghan foreign affairs to Britain in exchange for an annual subsidy of 600,000 rupees. Britain gained control of the Khyber and Michni passes and several frontier areas. However, the peace was short-lived; on September 3, 1879, an uprising in Kabul resulted in the massacre of the British envoy, Sir Louis Cavagnari, and his staff.
The Second Campaign and the Rise of Abdur Rahman Khan
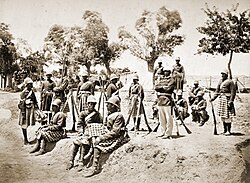
The massacre reignited the war. Major General Sir Frederick Roberts led the Kabul Field Force to occupy Kabul in October 1879. Despite a fierce uprising and the Siege of the Sherpur Cantonment in December 1879, the British maintained control, and Yaqub Khan was forced to abdicate.
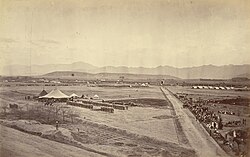
The British sought a stable ruler to act as a buffer against Russia and eventually recognized Abdur Rahman Khan as the Amir of Kabul in July 1880. However, Ayub Khan, the governor of Herat, rebelled and marched on Kandahar, achieving a significant victory over the British at the Battle of Maiwand.
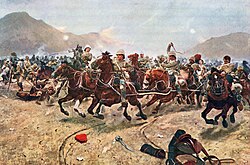
The conflict reached its climax in September 1880, when General Roberts led a decisive strike that defeated Ayub Khan outside Kandahar. This victory ended the rebellion and solidified Abdur Rahman Khan's position as the sole ruler of Afghanistan.
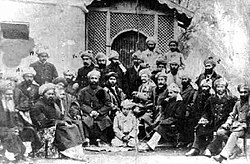
Military Logistics and Life in the Field
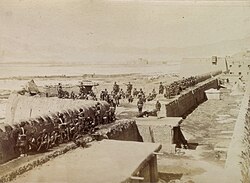
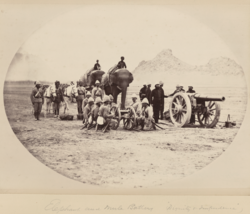
The war utilized a variety of transport and weaponry. British forces employed both elephant and mule batteries to move artillery through the rugged Afghan terrain. For example, the Rifled Muzzle Loader (RML) 7-pounder mountain gun was typically towed by mules, while larger pieces, such as the Rifled Breech Loader (RBL) 40-pounder Armstrong gun, required elephants.
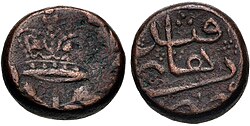
The occupation also left a mark on local commerce. In Kandahar, local authorities issued coins that were frequently recalled and devalued, leading to a wide variety of opportunistic designs featuring animal or flower motifs.
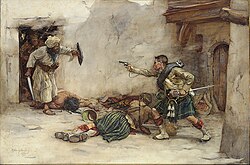
Aftermath and the Durand Line
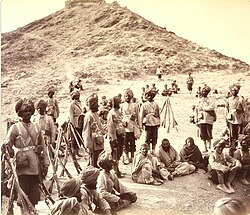
The war proved far more expensive than anticipated, costing the British government approximately 19.5 million pounds. British and Indian forces fully withdrew from Afghanistan by March 1881.
To prevent future conflicts and clearly define the spheres of influence between British India and Afghanistan, Mortimer Durand negotiated the Durand Line Agreement on November 12, 1893. This established the border that would eventually define the North-West Frontier Province.
| Category | Details |
|---|---|
| Dates | 1878–1881 |
| Key British Commanders | Frederick Roberts, Samuel Browne, Donald Stewart |
| Key Afghan Leaders | Sher Ali Khan, Yaqub Khan, Ayub Khan, Abdur Rahman Khan |
| Major Battles | Ali Masjid, Maiwand, Kandahar, Charasiab |
| British Casualties | 11,850+ killed/died of wounds; 8,000+ died of disease |
| Afghan Casualties | 5,000+ killed in major battles (Total unknown) |
Frequently Asked Questions
What was the primary cause of the Second Anglo-Afghan War?
The war was driven by the "Great Game," a strategic rivalry between Britain and Russia. Britain feared Russian influence in Afghanistan and invaded after the Afghan Amir, Sher Ali Khan, refused to accept a British diplomatic mission following the arrival of a Russian one.
What was the significance of the Treaty of Gandamak?
The Treaty of Gandamak (1879) forced Afghanistan to cede control of its foreign affairs to Britain and surrender strategic territories, including the Khyber Pass and Quetta, in exchange for an annual subsidy.
Who was the Battle of Maiwand's most notable outcome?
The Battle of Maiwand was a significant Afghan victory where Ayub Khan's forces defeated a British detachment, leading to the siege of Kandahar before the British eventually regained control.
How did the war end?
The war ended after the British decisively defeated Ayub Khan at the Battle of Kandahar in 1880. Abdur Rahman Khan was installed as Emir, and British forces withdrew from Afghanistan by March 1881.
What is the Durand Line?
The Durand Line is the border established by the 1893 agreement between Sir Mortimer Durand and Emir Abdur Rahman Khan to fix the limits of influence between British India and Afghanistan.