Pursuit to HaritanWorld War IEgyptian Expeditionary ForceDesert Mounted CorpsYildirim Army Group

Pursuit to Haritan: The Final Allied Advance in the Middle Eastern Theatre

Pursuit to Haritan: The Final Allied Advance in the Middle Eastern Theatre The Pursuit to Haritan was a decisive military operation conducted between September 29 and October 26, 1918. As...

Pursuit to Haritan: The Final Allied Advance in the Middle Eastern Theatre

The Pursuit to Haritan was a decisive military operation conducted between September 29 and October 26, 1918. As the closing chapter of the Sinai and Palestine Campaign during World War I, it saw the XXI Corps and the Desert Mounted Corps of the Egyptian Expeditionary Force (EEF) chase the retreating remnants of the Ottoman Yildirim Army Group. Following the capture of Damascus on October 1, Allied forces pushed northward, securing vital ports and cities to bring the conflict in the region to a conclusion.

This rapid advance was characterized by high mobility, utilizing cavalry and armored cars to outpace a crumbling Ottoman defense. The operation spanned hundreds of miles, moving from the coast of Lebanon into the heart of northern Syria.
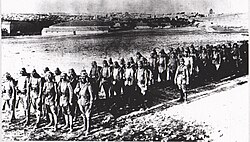
Ottoman infantry column c 1917 many wearing Keffiyehs

Key Facts

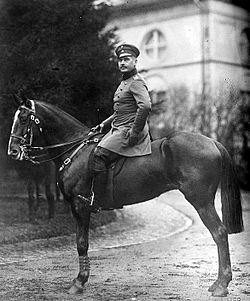
Otto Liman von Sanders
  • Timeline: September 29 to October 26, 1918.
  • Primary Objective: Pursuit of the Yildirim Army Group from Damascus toward Aleppo and Haritan.
  • Key Allied Commanders: General Edmund Allenby, Edward Bulfin, Henry Chauvel, and Prince Feisal.
  • Key Ottoman/German Commanders: Liman von Sanders, Mustafa Kemal Pasha, Jevad Pasha, and Gustav von Oppen.
  • Outcome: Decisive Allied victory leading to the occupation of Aleppo and the eventual armistice.
  • Distance Covered: The 15th Imperial Service Cavalry Brigade rode 567 miles (912 km) over 38 days.

Securing the Coast: Beirut and Tripoli
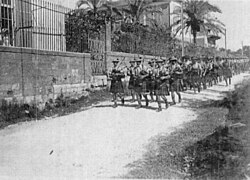
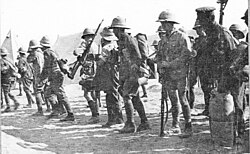
10 October 1918, 2nd Battalion Black Watch (7th Meerut Division) arrive in Beirut after marched 96 miles (154 km) in 8 days from Haifa

To sustain an inland pursuit, the EEF first needed to secure Mediterranean supply ports. Infantry and corps cavalry advanced from Haifa and Acre, targeting the strategic ports of Beirut and Tripoli. Beirut, a city of 190,000 people, was defended by the Ottoman 43rd Division but fell to the 7th (Meerut) Division.
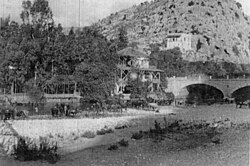
7th (Meerut) Division at Nahr al-Kalb (Dog River)

Following the capture of Beirut, Allied forces pushed further north to Tripoli. The arrival of the 19th Brigade on October 18 and the remainder of the 7th Division on October 28 solidified control over the coast, providing the necessary logistics for the cavalry's push toward Aleppo.
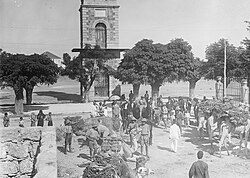
British troops and camels in Tripoli, reached by the armoured cars and XXth Corps Cavalry on 13 October, by the 19th Brigade on the 18 October, the remainder of the 7th Division on the 28 October and the Australian Mounted Division on 7 November 1918

The Inland Pursuit: From Damascus to Homs
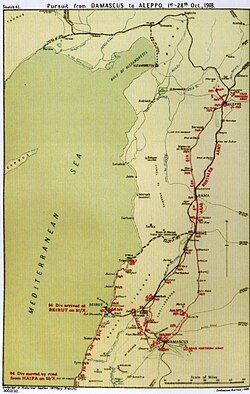
Falls Sketch Map 41 Pursuit from Damascus to Aleppo 1 to 28 October. The Australian Mounted Division advance from Damascus to Homs 29 October to 1 November not shown

On October 5, the 4th and 5th Cavalry Divisions departed Damascus. They were supported by the 12th Light Armoured Motor Battery and the 7th Light Car Patrol. Their first major objective was Rayak, a critical railway junction connecting Constantinople, Beirut, and Damascus.

By October 6, the 5th Cavalry Division occupied Rayak, discovering the wreckage of 32 German aircraft and significant military stores abandoned by the retreating enemy. The advance continued through Zahle and Baalbek, eventually reaching Homs on October 16.
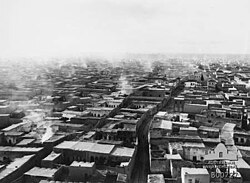
Homs, November 1918
Homs, November 1918

At Homs, the 5th Cavalry Division was reinforced by the 2nd Light Car Patrol and the 2nd Light Armoured Motor Battery. However, the 4th Cavalry Division, decimated by sickness to a strength of only 1,200 men, was unable to provide further support, effectively ending its campaign.
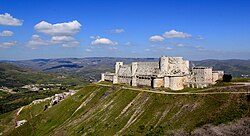
Krak des Chevaliers overlooking Homs

The Drive to Aleppo and the Charge at Haritan
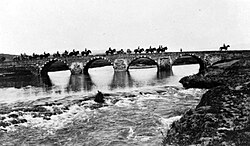
'B' Battery AIF Heavy Artillery Group crossing the Leontes River during their march to Aleppo from Tripoli in February 1919

General Allenby ordered the capture of Aleppo by October 26. The 5th Cavalry Division, supported by Prince Feisal's Sherifial Force (including 1,500 regulars under Nuri Bey), pushed north. Along the way, they encountered the Orontes River at Er Rastan, where the retreating Ottomans had destroyed the bridge. Royal Engineers repaired the span by October 21, allowing the division to reach Hama.
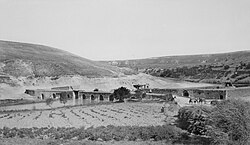
Motor car crossing the bridge over the Orontes River at Er Rastan

The advance was supported by the Bristol Fighters of No. 1 Squadron, which flew reconnaissance missions over vast areas—sometimes 500 to 600 miles—to track enemy movements. On October 22, armored cars engaged in a 15-mile running battle near Khan Sebil, capturing a German armored car and two lorries.
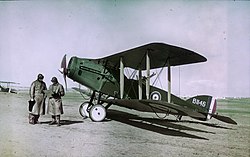
Hand coloured photo of a Bristol F.2B Fighter of No. 1 Squadron, Australian Flying Corps flown by Ross Smith in Palestine, February 1918.

Aleppo was captured during the night of October 25/26 by the Sherifial Force after an initial daytime failure. On October 27, the 15th (Imperial Service) Cavalry Brigade encountered a retreating Ottoman column near Haritan. In a final bold action known as the Charge at Haritan, the brigade attacked the rearguard, forcing the remaining Ottoman forces to withdraw further north.
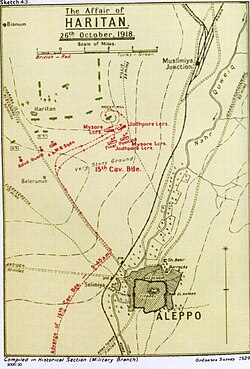
Falls Sketch Map 43 Haritan 26 October 1918

Final Movements and the Armistice

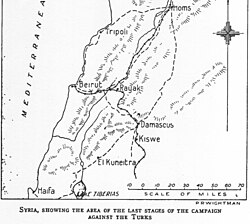
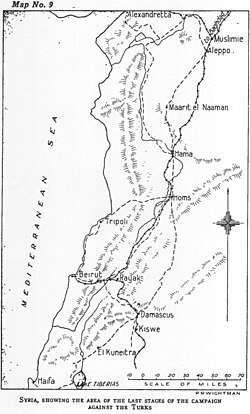
Cutlack Map 9 details shows area from the Sea of Galilee to Homs, the Lebanon and Anti-Lebanon mountain ranges and the breaks between Damascus and Beirut and Damascus and Tripoli and Homs

While the 5th Cavalry Division fought at Haritan, the Australian Mounted Division was ordered to reinforce them. They marched from Damascus on October 27, passing through Duma and Nebk. By the time they reached Homs on November 1, they received word that the war against the Ottoman Empire had ended.
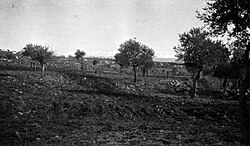
Australian Mounted Division's first camp at Tripoli, showing the snowcapped mountains of Lebanon in the background

The armistice required the Ottoman Empire to surrender its remaining military assets and evacuate occupied territories. The region was subsequently divided into administrative zones (North, North West, East, and South) before the terms of the Sykes-Picot Agreement were imposed by France.
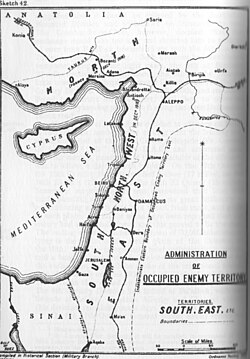
Falls Sketch Map 42 Administration of Occupied Enemy Territory shows boundaries of the North, North West, East and South territories before France imposed the terms of the Sykes-Picot Agreement

Category Details
Allied Forces XXI Corps, Desert Mounted Corps (UK, India, Australia, NZ), Sherifial Force
Opposing Forces Yildirim Army Group (Ottoman Empire, German Empire)
Key Cities Captured Beirut, Tripoli, Rayak, Homs, Hama, Aleppo
Critical Action Charge at Haritan (October 27)
Logistical Feat 15th Cavalry Brigade covered 567 miles in 38 days

Frequently Asked Questions

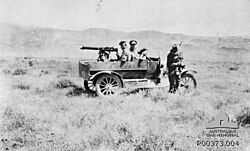
Model T Ford Utility manned by Australian soldiers and armed with Vickers .303 machine gun mounted on a tripod
Cutlack Map 9 from the Sea of Galilee to Alexandretta with the Lebanon and Anti-Lebanon mountain ranges, rivers, the main roads and railways
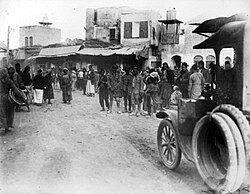
Hama city during the British Army occupation in December 1918
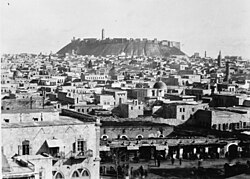
Aleppo c 1918 dominated by the citadel
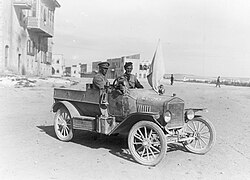
Captain Macintyre, commander of the 7th Light Car Patrol, who unsuccessfully demanded Mustapha Kemal surrender Aleppo, with the flag of truce used on 23 October
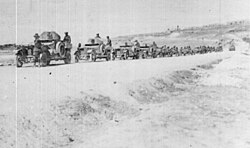
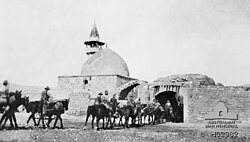
No. 12 Light Armoured Motor Battery and No. 7 Light Car Patrol with the 5th Cavalry Brigade on the road north of Aleppo. Mehemet Ali military barracks in background
Australian Mounted Division arrive at Kuteife 30 miles (48 km) north of Damascus
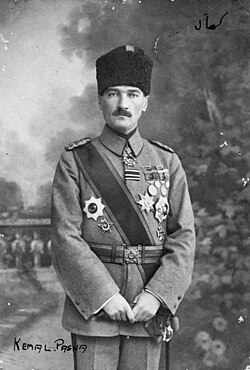
Mustafa Kemal Pasha as the Commander of the Yıldırım Army Group, 1918.
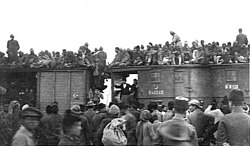
Ottoman soldiers' train preparing to go through the Taurus Mountain tunnels at Adana.
Demobilising troops at Kantara 1918

What was the primary goal of the Pursuit to Haritan?

The primary goal was to pursue and defeat the retreating remnants of the Ottoman Yildirim Army Group following the fall of Damascus, eventually securing Aleppo and forcing an Ottoman surrender in the region.

Who were the main commanders involved in this operation?

The Allied forces were led by General Edmund Allenby and Henry Chauvel, with Prince Feisal leading the Sherifial Force. The Ottoman and German forces were commanded by Liman von Sanders and Mustafa Kemal Pasha.

What role did the Sherifial Force play in the capture of Aleppo?

The Sherifial Force, operating on the right flank of the 5th Cavalry Division, successfully captured Aleppo during the night of October 25/26, 1918, after an unsuccessful attempt earlier that day.

How did the 4th Cavalry Division's role change during the pursuit?

Initially part of the advance, the 4th Cavalry Division was severely reduced by sickness to only 1,200 men. By October 20, it was unable to support the 5th Cavalry Division at Aleppo and was relegated to garrisoning Homs.

What was the significance of the Charge at Haritan?

The Charge at Haritan was the final action of the pursuit, where the 15th (Imperial Service) Cavalry Brigade attacked a retreating Ottoman column and rearguard, effectively ending organized resistance in the area.

References

  1. At the Nahr el Kelb/Dog River invaders from the Egyptian Rameses II, Babylonian, Assyrian Roman and Ottomans left an engraved record inscribes onto the cliffs (Commemorative stelae of Nahr el-Kalb). These were joined by World War I inscriptions. [Falls 1930 Vol. 2 p. 603] [Hall 1967 p. 101] The XXI Corps added an inscription reading "The XXI British Army Corps with Le Detachment Français de Palestine et Syrie occupied Beirut and Tripoli October 1918 AD". See: National Archives of Australia
  2. The 5th Cavalry Division has been described as including the 5th Mounted Brigade but only the 1/1st Gloucester Yeomanry from that brigade were in the 5th Cavalry Division [Woodward 2006 p. 206] [Falls 1930 Vol. 2 pp. 661, 667]
  3. The 4th Cavalry Division had been garrisoning Beisan and engaged in operations to cut the last remaining lines of retreat across the Jordan River north from Jisr ed Damieh. During this time it is possible they were struck by the same malarial attack that had afflicted those units of Chaytor's Force which had held the Jisr ed Damieh crossing.
  4. The 15th Imperial Service Cavalry Brigade, fielded by Indian Princely States, had seen service in the theatre since 1914; from the defence of the Suez Canal onwards including garrison duties defending the bridgehead on the Jordan River. [Falls 1930 Vol. 2 Part II pp. 423–4]
  5. Column "A" was followed a day later by the 13th and 14th Cavalry Brigades. [Wavell p. 231]