Battle of Driefontein: A Strategic British Victory in the Second Boer War
The Battle of Driefontein, fought on March 10, 1900, stands as a pivotal engagement during the Second Boer War. Occurring shortly after the Battle of Poplar Grove, this clash was a critical component of the British offensive to capture the capitals of the Boer republics—Bloemfontein and Pretoria—during the first half of 1900.
The conflict pitted the forces of the United Kingdom against the combined resistance of the South African Republic and the Orange Free State. The outcome of this battle significantly accelerated the British campaign in the region, leading to the eventual fall of Bloemfontein.
Key Facts
- Date: March 10, 1900
- Location: Near Bloemfontein, Orange Free State
- Outcome: British victory
- British Commander: Lord Roberts
- Boer Commander: Christiaan de Wet
- Strategic Result: British control of the Orange Free State within two months
The Strategic Engagement
As the British army advanced toward Bloemfontein, they encountered a formidable defensive line held by Boer forces under the command of Christiaan de Wet. The Boers had established a defensive perimeter stretching approximately 7 miles (11 km), effectively blocking the primary approach to the city.
To break this deadlock, Lord Roberts implemented a coordinated pincer movement. He ordered Lieutenant General Thomas Kelly-Kenny to lead a division in a direct frontal assault on the Boer positions. Simultaneously, a second division, commanded by Lieutenant General Charles Tucker, maneuvered to strike the Boer left flank.
This dual-pronged attack forced the Boer forces to withdraw from their positions. While the British achieved their objective, the victory came at a cost of casualties on both sides.
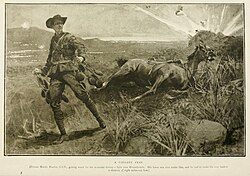
Forces and Casualties
The British forces held a significant numerical advantage, deploying 10,000 troops supported by two Vickers guns (early rapid-fire machine guns). The Boer forces were smaller, estimated between 1,500 and 6,000 men.
| Detail | United Kingdom | Boer Republics |
|---|---|---|
| Commanders | Lord Roberts, Robert Broadwood, Thomas Kelly-Kenny | Christiaan de Wet |
| Troop Strength | 10,000 | 1,500 – 6,000 |
| Killed | 82 | 102 |
| Wounded/Captured | 342 wounded | 22 captured |
British Order of Battle
The British victory was supported by a diverse array of infantry and mounted units:
- Infantry: 1st Battalion Coldstream Guards, 1st Battalion Essex Regiment, 1st Battalion Gordon Highlanders, 2nd Battalion East Kent Regiment, 1st Battalion Oxfordshire Light Infantry Regiment, 1st Battalion Welch Regiment, and 1st Battalion Yorkshire Regiment.
- Mounted Units: 2nd Dragoons, 6th Dragoons, 14th Hussars, 12th Lancers, 16th Lancers, Royal Horse Guards, 1st Battalion Life Guards, and 2nd Battalion Life Guards.
Aftermath and Impact
The victory at Driefontein broke the Boer line and cleared the path for the British to enter Bloemfontein. In the two months following the battle, Lord Roberts successfully drove the Boer forces out of the city and established control over the entire Orange Free State.
Frequently Asked Questions
When did the Battle of Driefontein take place?
The battle took place on March 10, 1900, during the Second Boer War.
Who were the primary commanders during the battle?
The British forces were led by Lord Roberts, with Lieutenant Generals Thomas Kelly-Kenny and Charles Tucker commanding divisions. The Boer forces were led by Christiaan de Wet.
What was the strategic result of the battle?
The British victory forced the Boers to withdraw from their 7-mile defensive line, allowing Lord Roberts to capture Bloemfontein and eventually control the Orange Free State.
How many casualties were suffered by each side?
The British suffered 82 killed and 342 wounded. The Boer forces suffered 102 killed and 22 captured.
What tactics did Lord Roberts use to win the battle?
Lord Roberts used a combined assault strategy, ordering a frontal attack by Lieutenant General Kelly-Kenny's division while Lieutenant General Tucker's division attacked the Boer left flank.