Battle of Magersfontein: A Tactical Disaster of the Second Boer War
The Battle of Magersfontein, fought on December 11, 1899, stands as one of the most significant tactical failures for the British Army during the Second Boer War. Occurring in the Cape Colony of South Africa, the engagement resulted in a decisive Boer victory that halted the British advance toward the besieged town of Kimberley. This clash was a central part of "Black Week," a period of three consecutive British defeats that shocked the government in London and forced a massive strategic overhaul of the campaign.
The battle is primarily remembered for the devastating losses suffered by the Highland Brigade, who marched into a cleverly concealed trap. The failure was not merely one of courage, but of intelligence and outdated tactical doctrine in the face of innovative defensive warfare.
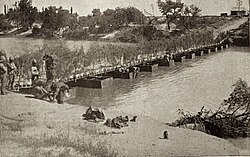
Key Facts
- Date: December 11, 1899
- Outcome: Boer victory
- British Commander: Lord Methuen
- Boer Commanders: Piet Cronje, Koos de la Rey, Naas Ferreira, Petrus Liebenberg
- British Casualties: 210 killed, 675 wounded, 63 missing
- Boer Casualties: 236 killed or wounded
- Strategic Impact: Part of "Black Week," leading to the appointment of Lord Roberts as Commander in Chief.
The Prelude: Outdated Tactics vs. Innovation
Following the British victory at Tel-el-Kebir, the army had relied on a standard tactical formula: a night march in close order to maintain cohesion, followed by a rapid deployment into open order just before dawn, and a final frontal bayonet charge. Lord Methuen applied this exact blueprint at Magersfontein.
Methuen's plan involved a heavy artillery bombardment on the evening of December 10, followed by a night march by the Highland Brigade under Major General Andrew Gilbert Wauchope. Wauchope had expressed concerns and advocated for a flanking maneuver along the Modder River, but Methuen insisted on a frontal assault on the southern end of the Magersfontein Ridge.
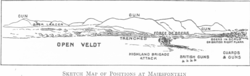
The British Disposition
The British forces were organized into three columns. The first, and primary attacking force, consisted of the Highland Brigade (including the Black Watch, Seaforth Highlanders, Argyll and Sutherland Highlanders, and Highland Light Infantry), supported by the 9th Lancers and engineers. To maintain order during the night, 3,500 men were compressed into a compact formation only 45 yards wide and 160 yards long, using ropes to guide their movement in the dark.
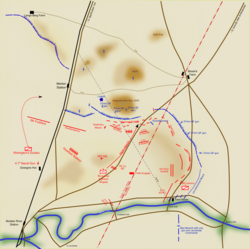
The Boer Trap
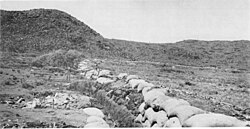
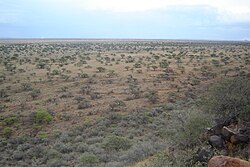
The critical failure of the British operation was a lack of adequate reconnaissance. Lord Methuen assumed the Boers were positioned on the forward slopes of the hills, as was standard practice. However, Vecht-generaal (Combat General) Koos de la Rey had innovated, entrenching his forces at the foot of the hills.
This positioning meant that the British artillery bombardment, which targeted the slopes, was largely ineffective. The Boers remained safe in their trenches, waiting for the British infantry to enter their kill zone.
The Engagement: Chaos at Dawn
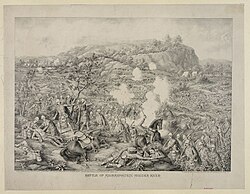
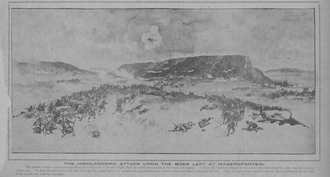
As the Highland Brigade advanced, they reached within 400 yards of the Boer lines before the defenders opened fire. Because the British were still in their compact quarter columns, they were unable to deploy into a fighting formation quickly enough. The resulting carnage was immediate; General Wauchope and Lieutenant-Colonel G. L. J. Goff were killed in the opening volleys.
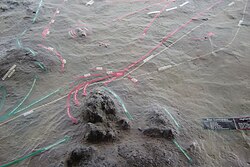
The confusion was compounded by wire entanglements placed in front of the Boer trenches. Many soldiers were shot while trapped in the wire, and those who attempted to charge the hill were engaged by Boer parties and, in some cases, their own artillery. It is estimated that 700 British casualties occurred within the first five minutes of the engagement.
The Struggle to Withdraw
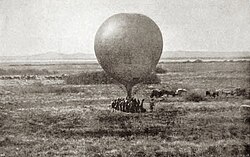
After sunrise, the remnants of the Highland Brigade found themselves pinned down, unable to advance or retreat. Fire support from Maxim guns and naval artillery eventually provided enough cover for some men to withdraw, but the artillery continued to miss the target by firing at the slopes rather than the trenches at the base.
The Scandinavian Volunteer Corps
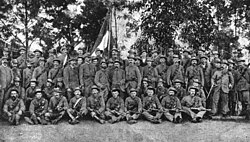
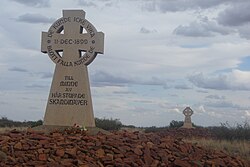
Among the Boer forces was the Scandinavian Volunteer Corps, a unit of approximately 82 to 100 men from Sweden and other Scandinavian countries. Equipped with Mod. 1888 Mauser rifles, this unit fought alongside the Boers but suffered devastating losses during the battle, resulting in the corps being effectively destroyed.
Aftermath and Strategic Consequences
The defeat at Magersfontein, combined with losses at Stormberg and Colenso, created a political crisis in Britain. This "Black Week" led to the immediate dispatch of massive reinforcements from Britain and the Dominions. General Lord Roberts was appointed Commander in Chief, eventually relieving Kimberley in February 1900 and forcing General Cronje's surrender at the Battle of Paardeberg.
| Feature | British Empire | Boer Republics |
|---|---|---|
| Commanders | Lord Methuen, Gen. Wauchope | Piet Cronje, Koos de la Rey |
| Troop Strength | 14,964 men, 27 guns | 8,500 men, 5 guns, 3 machine guns |
| Key Units | Highland Brigade | Scandinavian Volunteer Corps |
| Casualties | ~948 (Killed/Wounded/Missing) | 236 (Killed/Wounded) |
| Result | Tactical Defeat | Tactical Victory |
Frequently Asked Questions
Why did the British suffer such heavy losses?
The British suffered because they relied on outdated tactics, marching in compact columns that made them easy targets. Additionally, they failed to realize the Boers had entrenched themselves at the foot of the hills rather than on the slopes, rendering the British artillery bombardment useless.
What was "Black Week"?
Black Week refers to the period between December 10 and 17, 1899, during which the British suffered three major defeats at Stormberg, Magersfontein, and Colenso, causing a political shock in the United Kingdom.
Who were the Scandinavian volunteers?
The Scandinavian Volunteer Corps was a small unit of roughly 100 volunteers from Scandinavia who supported the Boer republics. They were heavily engaged at Magersfontein and were almost entirely destroyed as a fighting force.
How did the battle affect the overall war?
While a tactical victory for the Boers, the defeat forced the British to send massive reinforcements and change their leadership, leading to the appointment of Lord Roberts, who eventually broke the Boer resistance in the region.
Which British units were most affected?
The Highland Brigade suffered the worst casualties, including the loss of their commander, Major General Wauchope, and many men from the Black Watch and the Argyll and Sutherland Highlanders.