Battle of Königgrätz: The Decisive Clash of the Austro-Prussian War
The Battle of Königgrätz, also known as the Battle of Sadová, stands as the pivotal engagement of the Austro-Prussian War. Fought on July 3, 1866, near the Bohemian city of Hradec Králové (Königgrätz) and the village of Sadová in the modern-day Czech Republic, it was the largest battle in the world since the Battle of Leipzig in 1813. The conflict pitted the Kingdom of Prussia against the Austrian Empire and its ally, Saxony, ultimately reshaping the political landscape of Central Europe.
The Prussian victory was not merely a result of numbers, but of a shift in military science. Through the implementation of tactical doctrine—the standardized set of principles guiding military action—and the use of the Dreyse needle gun (a breech-loading rifle allowing soldiers to fire while prone), Prussia achieved a technological and operational edge over the Austrian forces.
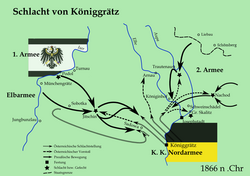
Key Facts
- Date: July 3, 1866
- Outcome: Decisive Prussian victory leading to the Peace of Prague.
- Prussian Advantage: Superior training, railroad logistics, and the Dreyse needle gun.
- Scale: The largest battle of the Austro-Prussian War and the largest European engagement since 1813.
- Political Impact: Paved the way for German unification under the "Little Germany" solution (excluding Austria).
Strategic Background and Prelude
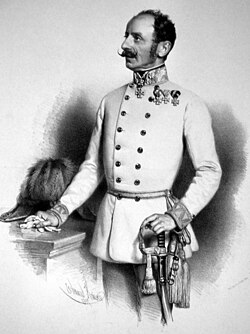
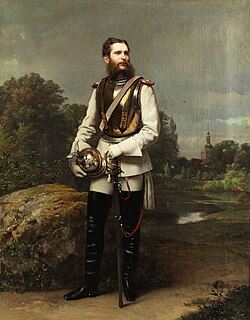
In June 1866, Prussian forces were divided into three main groups: the Army of the Elbe under Karl Herwarth von Bittenfeld, the First Army under Prince Friedrich Karl, and the Second Army under Crown Prince Frederick William. Meanwhile, the Austrian army, led by Ludwig von Benedek, was concentrated at Olmütz. Benedek had accepted his command with reluctance, citing his unfamiliarity with the local terrain and the troops under his command.
The campaign began with a Prussian advance into Saxony, where the Army of the Elbe defeated the Saxon army. To expedite the war, Chief of the General Staff Helmuth von Moltke executed a daring maneuver, ordering his armies to converge at Jitschin. By the eve of July 2, the Prussians sighted the Austrians near Sadová. Due to severed telegraph lines, the Second Army received its final orders via mounted officers who rode 32 kilometers through the night to ensure the Crown Prince's forces could coordinate their arrival.
The Course of the Battle
The Struggle in the Swiepwald
The battle commenced at dawn on July 3 amidst rain and mist. The Prussian right flank, led by Herwarth von Bittenfeld, was initially pinned down by Austrian artillery and Saxon fire from higher ground. The focus of the fighting shifted to the Swiepwald (Swiep forest), where the Prussian 7th Division attempted to clear Austrian defenders and secure the left flank.
While the Prussians captured Sadová, they faced grueling combat in the forest. Austrian artillery proved devastating, firing into the smoke of the Prussian advance and halting the 4th and 8th Divisions. Despite the Prussian struggle, Austrian commander Benedek declined to order a cavalry charge, a decision later criticized by historians as a missed opportunity to secure victory.
![Cavalry engagement at the battle of Königgrätz (Alexander von Bensa, [de] 1866)](/images/bf/e7/bfe75d8f1ef1cfe8f11d4834a186e7e9702c05ff0f4037a547e38a59bc76742d.jpg)
The Austrian Counterattack
At 11:00 am, the Austrians attempted to flank the Prussian 7th Division. Colonel Carl von Pöckh led a fierce infantry charge that pushed the Prussians back to the forest's edge. However, the charge was annihilated by flanking fire from the Prussian 8th Division. Although the Prussian center held, their own artillery was largely ineffective or positioned too far to the rear to support the infantry.
The Arrival of the Second Army
The tide turned at 2:30 pm with the arrival of Crown Prince Frederick William and the Second Army. Their sudden appearance on the Austrian right flank, combined with a heavy artillery bombardment of the Austrian center, shattered the enemy's cohesion.
Lieutenant General Wilhelm Hiller von Gaertringen's 1st Prussian Guard attacked the Austrian artillery, destroying the remaining cavalry batteries and forcing a general retreat. By 3:00 pm, Benedek ordered a withdrawal. While Austrian cavalry countercharges successfully covered the retreat and kept the bridges over the Elbe open, the cost was high, with 2,000 men and horses lost in these final actions.
Casualties and Aftermath
The battle resulted in staggering losses. The Prussians suffered approximately 9,172 casualties. The Austrians and Saxons faced far worse, with between 31,000 and 43,000 killed, wounded, missing, or captured. A tragic detail of the aftermath was the fate of the wounded; because Austria had refused to sign the First Geneva Convention, their medical personnel were treated as combatants and withdrew with the army, leaving over 900 wounded soldiers to suffer on the field.
This humanitarian crisis led Saxon nurse Marie Simon to provide care for the wounded for 17 weeks, an experience that helped spark the creation of the Albert Association, a precursor to the German Red Cross.
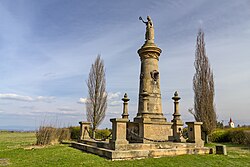
Politically, the victory cleared the path for the North German Confederation and the eventual unification of Germany without Austria. It also created deep resentment in France, who demanded Revanche pour Sadova (revenge for Sadová), contributing to the outbreak of the Franco-Prussian War in 1870.
| Category | Prussia | Austria & Saxony |
|---|---|---|
| Total Strength | ~285,000 | ~240,000 |
| Key Commanders | Helmuth von Moltke, Prince Friedrich Karl | Ludwig von Benedek |
| Total Casualties | 9,172 | 31,000 – 43,000 |
| Key Technology | Dreyse needle gun, Railroads | Traditional artillery/infantry |
| Result | Decisive Victory | Defeat / Retreat |
Frequently Asked Questions
Why was the Dreyse needle gun so important?
The Dreyse needle gun was a breech-loading rifle, meaning it was loaded from the rear rather than the muzzle. This allowed Prussian soldiers to reload while lying flat on the ground, making them smaller targets and allowing them to maintain a higher rate of fire than the Austrians.
How did railroads influence the outcome?
Prussia utilized railroad transport to move massive numbers of troops and supplies with unprecedented speed and efficiency, allowing them to concentrate their forces more effectively than the Austrian army.
What was the "Little Germany" solution?
The "Little Germany" (Kleindeutschland) solution was a political plan for German unification that excluded the Austrian Empire, ensuring that Prussia would be the dominant power in the newly formed German state.
What happened to the wounded after the battle?
Because Austria had not signed the First Geneva Convention, their medical staff were viewed as combatants and retreated with the army. This left hundreds of wounded soldiers without care until volunteers like Marie Simon arrived to assist them.
What was the long-term geopolitical effect of the battle?
Beyond German unification, the battle shifted the balance of power in Europe, weakening Austria and alarming France, which eventually led to the Franco-Prussian War of 1870.